Add A Soundtraxx Decoder To An Atlas GP40 (8/2021 ver)
Jim Exler, Nampa, ID February 4, 2024
Steps to Remove the Dynamic Brake Housing. The 21 pin decoder can be added without removing the shell.
To remove the dynamic brake (DB) housing from an Atlas HO scale GP-40 locomotive, hold the frame of the locomotive in one hand and, using the thumb and index finger of your other hand, pull up on the DB housing until its front and rear tabs are released and the housing can be removed.
In order to re-install the dynamic brake housing on an Atlas HO scale GP-40 locomotive, first put the locomotive down on a flat surface and hold its frame with one hand so that the locomotive will not move. Using the thumb and index finger of your other hand, tip the rear of the DB housing down so it is at about a 15 or 20 degree angle to the top of the long hood. Push the DB housing towards the rear of the locomotive so that its rear tab is caught under the top of the long hood. Then push the front (square) part of the housing down towards the top of the hood. A little judicious side-to-side wiggling at the front (square part) of the DB housing will spread the sides of the long hood apart just enough to assure that the tabs on both sides at the front of the housing are INSIDE these long hood side walls.
 |
|
| This view shows the cover removed. You can see the locking tab on the left end. There is a tab on the opposite side also. | |
 |
|
Here is a picture of the model with the cover removed. These show the motherboard with the 21 pin shorting board in place for DC operation. The wiring for the locomotive is connected to the motherboard with plugs. |
|
 |
|
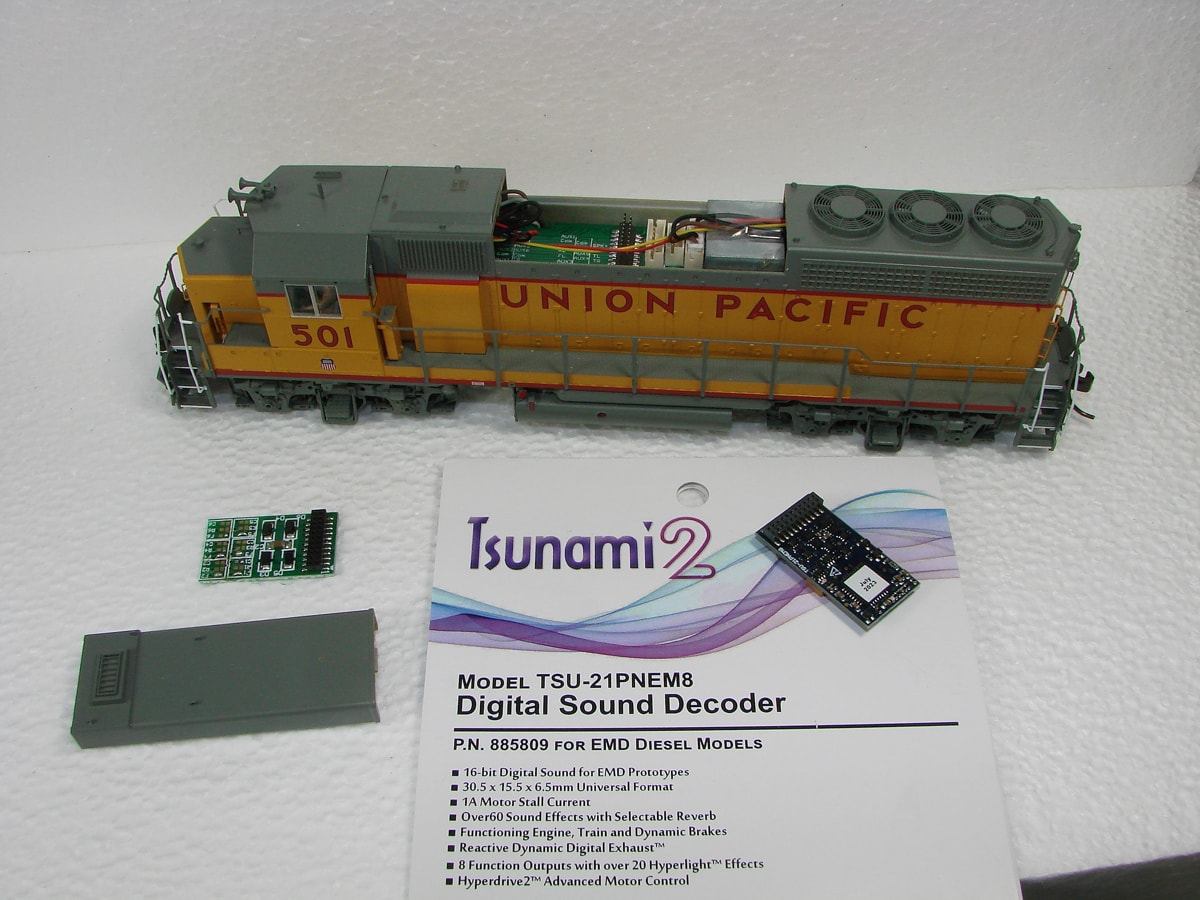
This shows the motherboard with the 21 pin connector. The Soundtraxx decoder is shown next to the model. |
|
 |
|
The new decoder has been installed on the 21 pin connector. Be sure to index the connectors correctly. At this point, you can test and set up the decoder to your desired settings; then replace the cover and enjoy. Removing the ShellTo explore the model more thoroughly, you need to remove the shell. First remove the couplers. Then, grab the bottom of the fuel tank with your one hand and the top of the shell with your other hand using your thumb on one side and your pointer finger on the other side in the rear of the shell. Be careful where you put your fingers so you don't break the hand rails. Slowly pull up and wiggle back and forth on the rear just below the sides of the radiator. The rear will pull up and be loose and the front should follow soon after. Just work the front the same way but make sure that your grip is around the cab whist being careful not to damage the shell. The shell is a friction fit. If you want to emove the fuel tank; the fuel tank is one piece. Pull down on one side of the tank and then on the other side. It will take some effort to remove the tank. You have to release the fuel tank from the frame in order to be able to remove it. The fuel tank must be clear on both sides of the frame. Be careful of the detail parts. |
|
 |
|
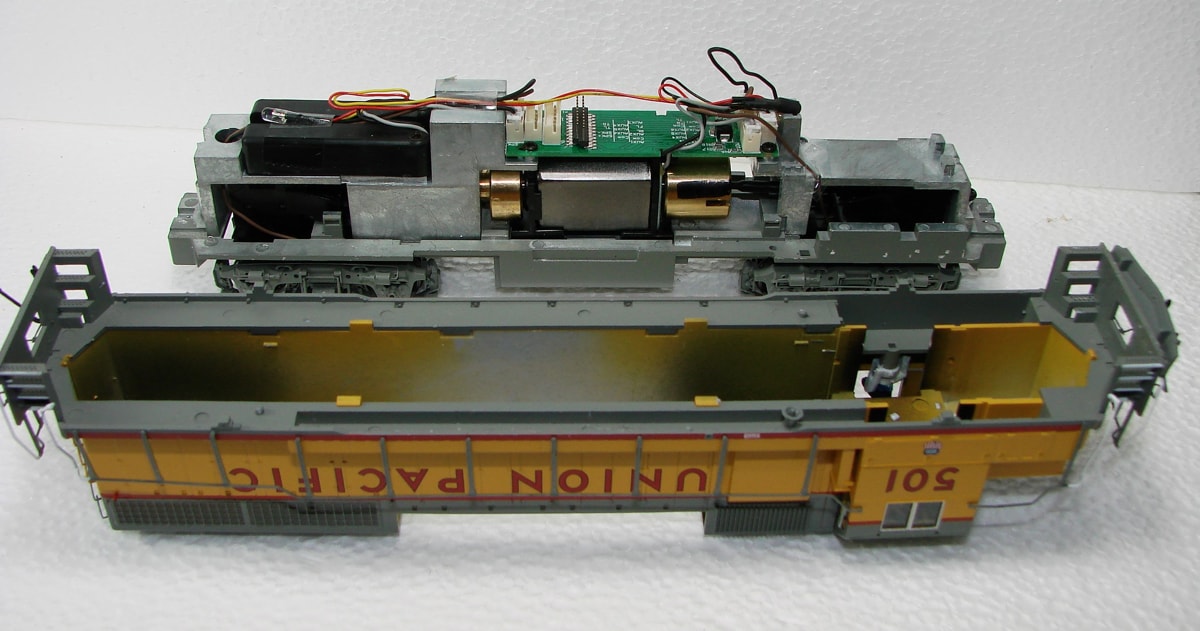
| The model with the shell removed. Please note the two pedestals with openings on the frame and the mating nibs in the inside of the shell. There are two on each side. This is what retains the shell. | |
| A closeup of the frame recessed connector. | 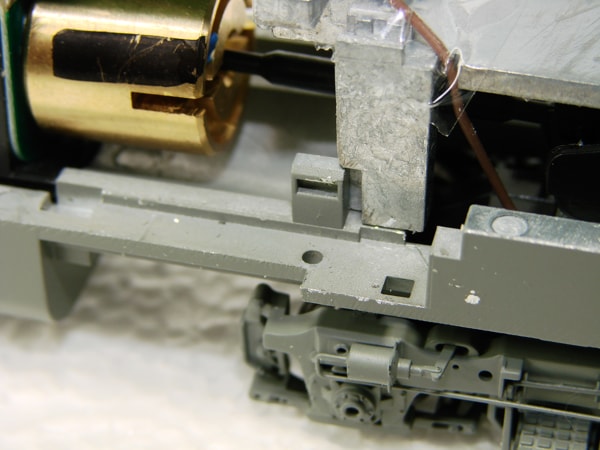 |
| A closeup of the nib on the inside of the shell. | 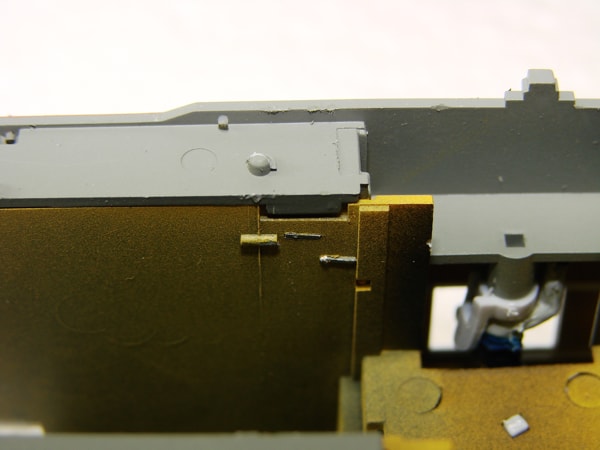 |
 |
|
| This view shows the right side with only the motherboard. |
|
 |
|
| This view of the left side shows the Soundtraxx 885809
TSU-21PNEM8 EMD Diesel decoder installed. Be sure to locate the index pin properly. |
|
 |
|
Here is one of the trucks disassembled. The proper way to dis-assemble the truck is to remove the bottom gear cover first. This will unlock the sideframes which can then be removed easily. Don't try to pry the sideframes off the truck. You'll most likely break one or more of the locking pins that hold them on. There are two clips on each side of the gear tower. Use a small screwdriver to unlatch them and the gearbox cover will come off. The sideframes can be removed and the wheelsets taken out. You can then remove the bearing plate which is also the electrical pickup. |
|