Replace A Soundtraxx Sound Value with a BH-1 Decoder in a Bachmann S2
Jim Exler, Nampa, ID March 5, 2023
Steps to Remove the Shell.
1. Remove the couplers first. They are the only thing holding the shell on the chassis.
2. Carefully lift the shell off the chassis. There are no retaining clips but it is a close fit.
 |
| This view shows the shell and you can see there are no retaining clips. The shell is a tight fit. Note that the lights are all mounted on the chassis so there are no wires in the shell to deal with. |
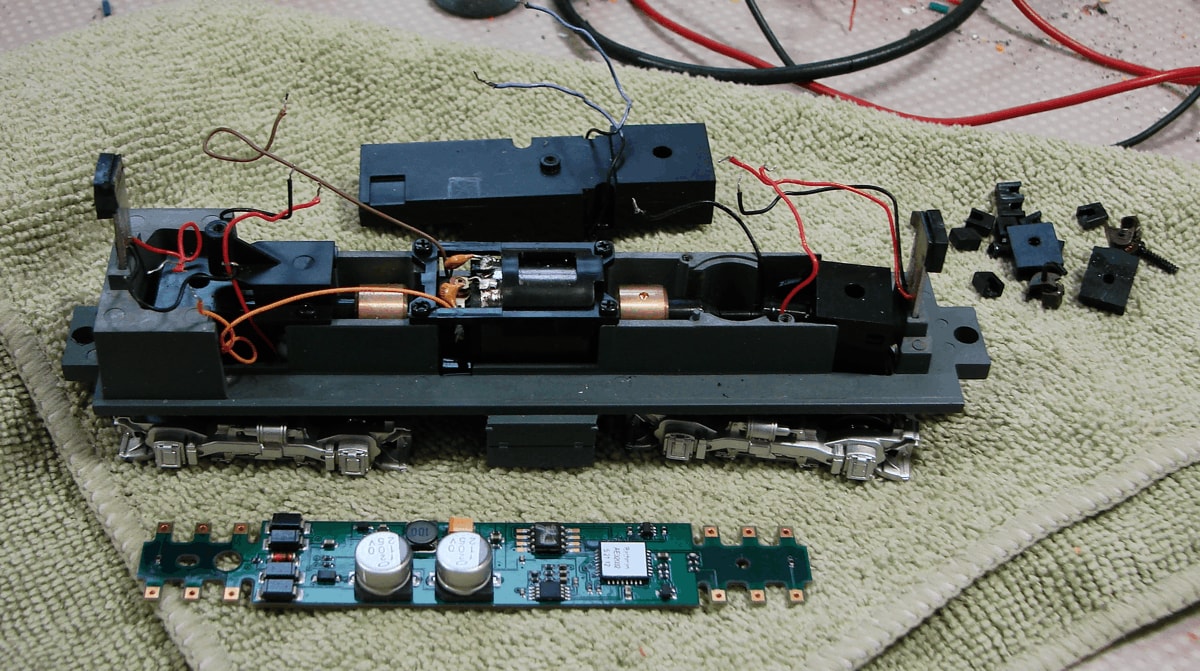 |
Here is the chassis with the sound value board and the speaker box removed. At this point, get some paint and color the speaker wires. I used purple to match Soundtraxx standards. The stock speaker wires are black and so is the left rail feeder and one of each comes up from the chassis in the same notch. If you mix them up, the decoder is fried; ask me how I know. The purple acrylic paint (one dollar at Amazon) is cheap insurance. |
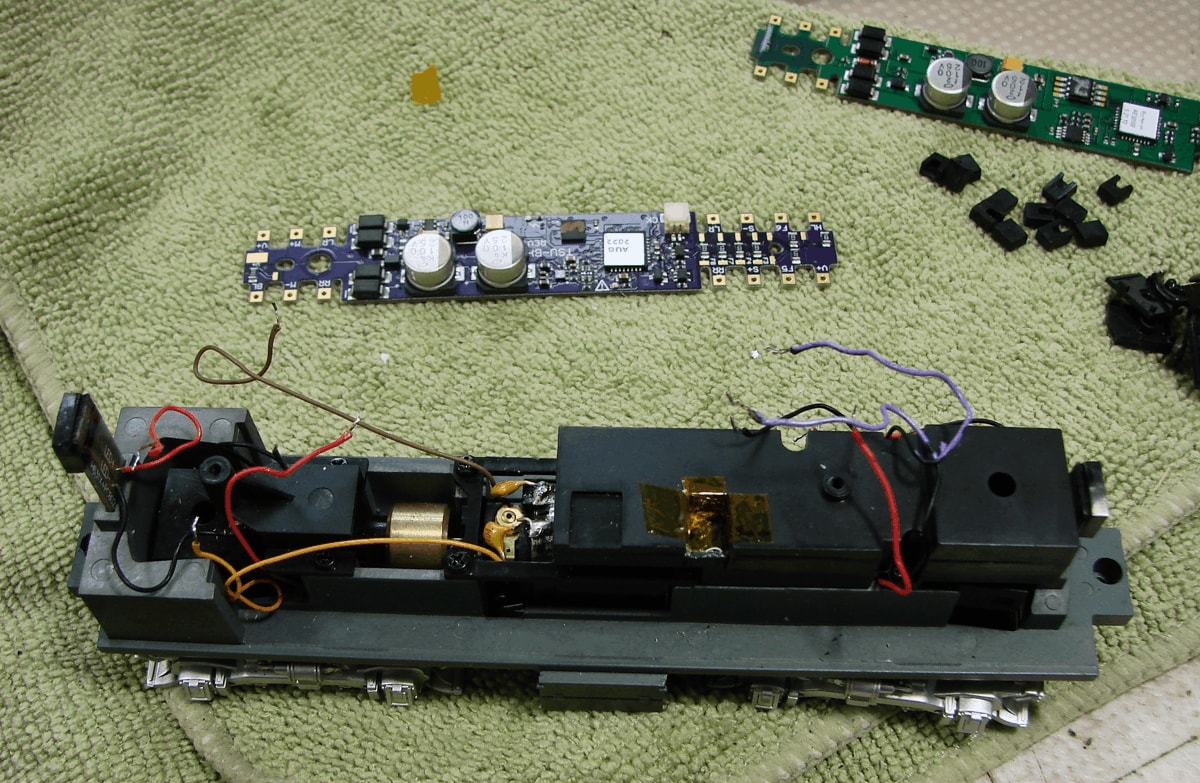 |
This view shows the chassis with the modified speaker box installed with its' pretty purple wires. The speaker box needs a notch cut out of it to clear the "Current Keeper" connector. Click HERE for a pdf file showing the dimensions for this modification. The decoder nearest the chassis is the new Soundtraxx BH-1 (ALCO) decoder that will be replacing the sound value board above. Note the white current keeper socket on the upper edge of the board to the left of the LR connection. I reversed the piece I removed and mounted it with a "blob" of acrylic caulk on a "shelf" inside the box. This provides a floor for the new opening. Some Kapton tape finished the seal. |
 |
 |
Here are 2 views of the model, ready to close. In the view directly above you can see the white connector in the speaker notch. Make sure all the wires are tucked in out of the way as the shell is a tight fit. |