 |
HO 34' Excursion Car |
I had a couple of MDC/Roundhouse Overton passenger car kits that had problems with the paint on the bodies. In about 1986 during a visit to the factory in Hawthorne, CA, Clarence Menteer, a fine gentleman and the owner of MDC replaced the kits with new ones and let me keep the original kits minus the bodies.
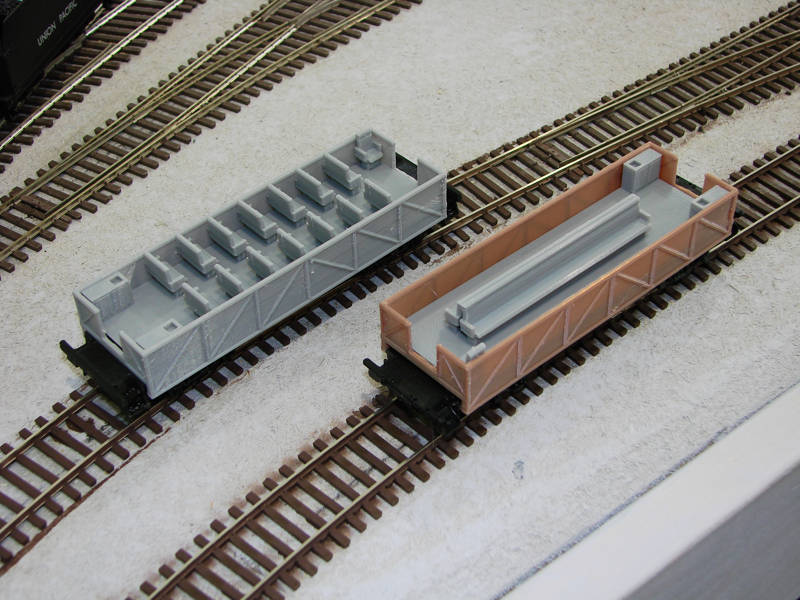
Recently I got the idea to make excursion cars using the floor and other parts from these kits. With my 3D printer, the bodies and interiors would be easy. Here are the results and some notes on construction.
For those starting from scratch, I also made my version of the MDC floor and it is listed below.
3D printed parts.
I gladly share any of my model or print files to those who want to print their own. Please contact me with any requests, questions or ideas.
I use Sketch Up 2020 for most of my models and sometimes AutoCad. Contact me if you would like the model file. Most of the parts in the interiors are done as separate components so you can use them to easily build your own interior.
Notes:
MDC used a pair of steel plates for added weight between the floor and the coach body. The rib inside the excursion body closely matches the thickness of this weight leaving a cavity to house the weight. My plan is to cut a one piece weight from a 4 square electric box cover. These are 16 gauge and match the original but by being one piece, they add rigidity to the frame. They are available everywhere for under a dollar.
On my floor, I added the queen post beams with holes but you will need to add the posts. The holes are also located for the truss rods or thread as MDC used.
The coupler pockets fit a Kadee #5 or equal. Tap the center post 2-56 and use a 1/8" screw. I cut the boss off the Kadee cover plates and used them for my covers. You may have to dress the center post to fit the hole in the coupler; the print is a close fit.
The truck mounts can use a #2 sheet metal or a 2-56 machine screw.
I printed the floor upside down with a slicer layer setting of 0.1 mm "Detail" and a 3 mm brim on my Prusa Mk3s printer. The results are amazing; I need to try this setting on some other items.
I printed the body upside down with a 3 mm brim at a layer setting of 0.15 mm and it comes out fine.
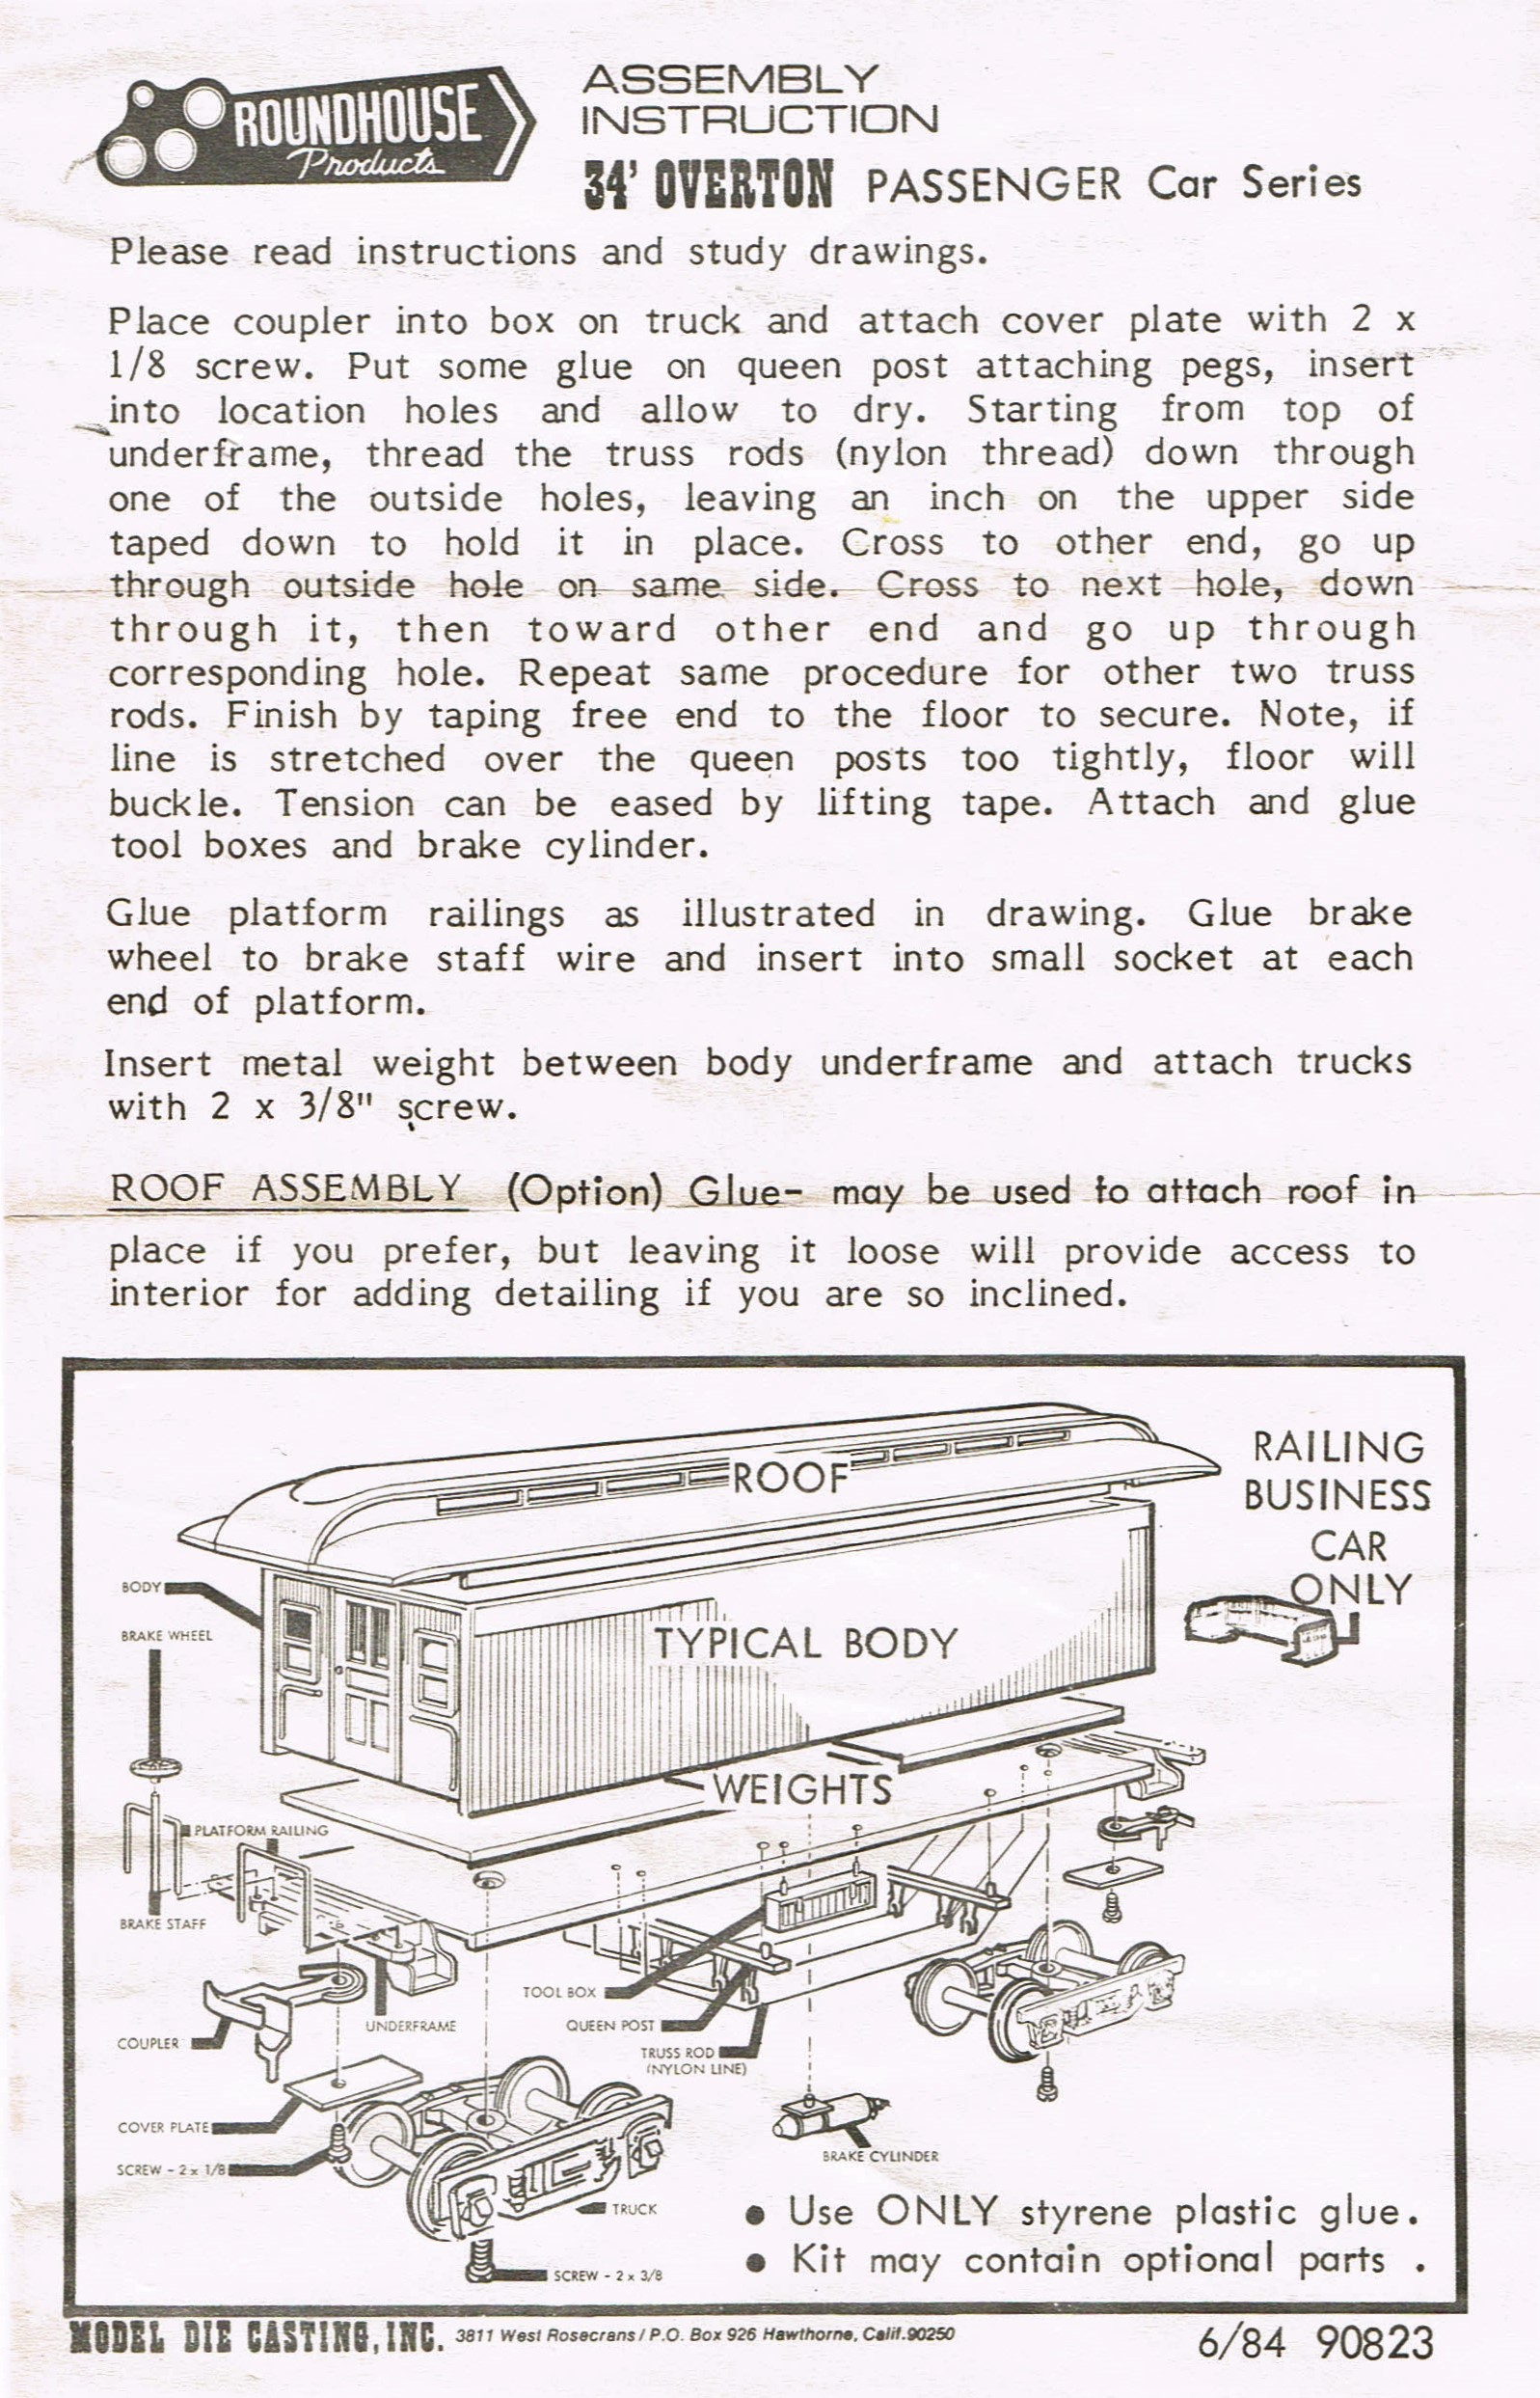
Included here are the original Overton instructions for the handrail and brake wheel layouts.
Have Fun.
Info: Model Die Casting (MDC) / Roundhouse as it was originally known is now part of Horizon Hobby and is listed under Athearn. Sadly, Clarence passed away in 2011.
| Description | Image | Print File | Type |
|---|---|---|---|
HO Excursion body (fits MDC Overton passenger car floor or my 3D printed floor below. |
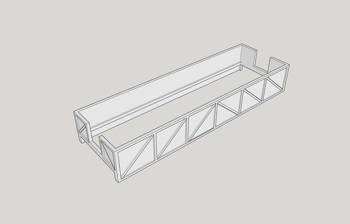 |
Excursion body | stl |
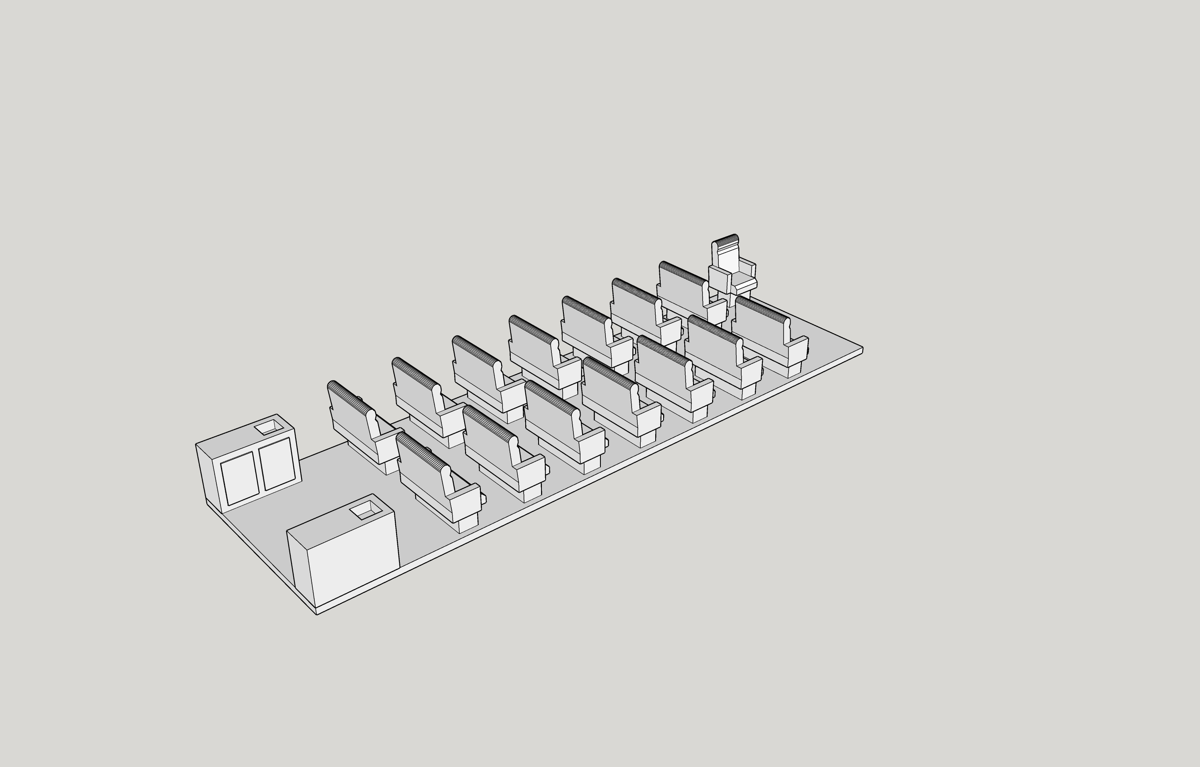
HO Excursion interior 1 (row seats). This will also fit inside a MDC Overton passenger car but the windows may not line up. |
 |
Excursion 1 | stl |
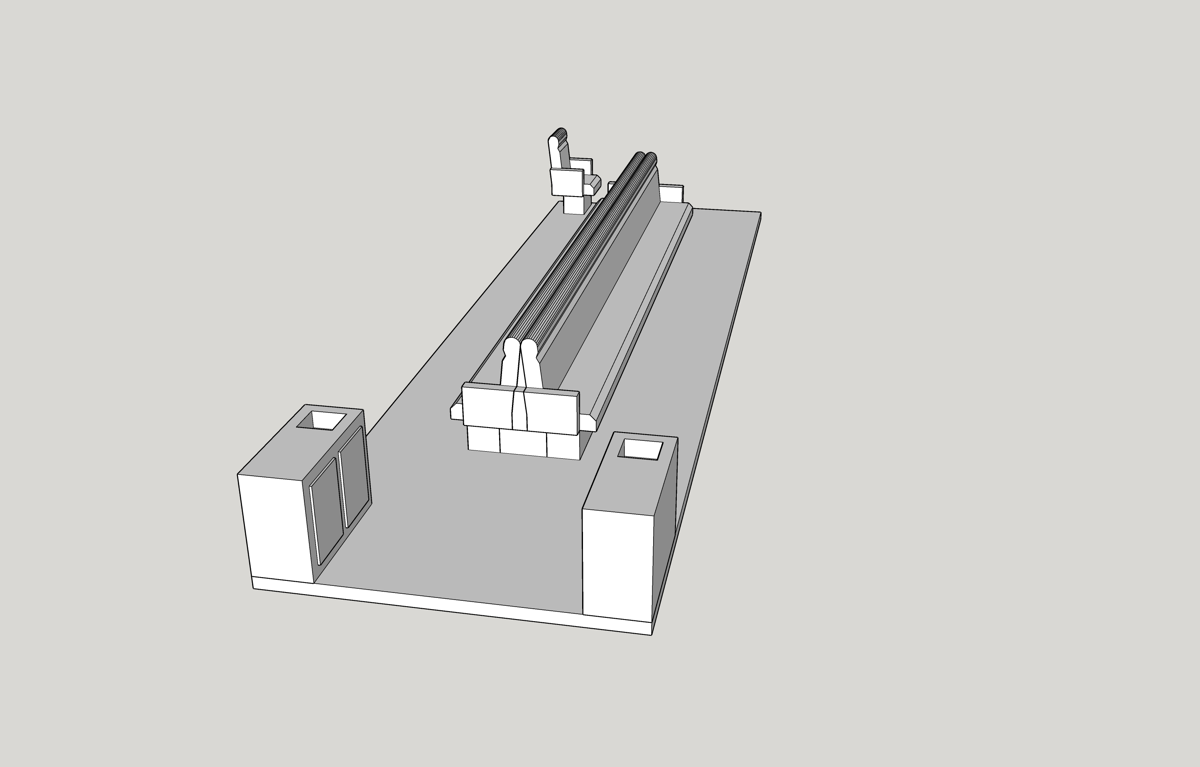
HO Excursion interior 2 (long bench seats center). This will also fit inside a MDC Overton passenger car. |
 |
Excursion 2 | stl |
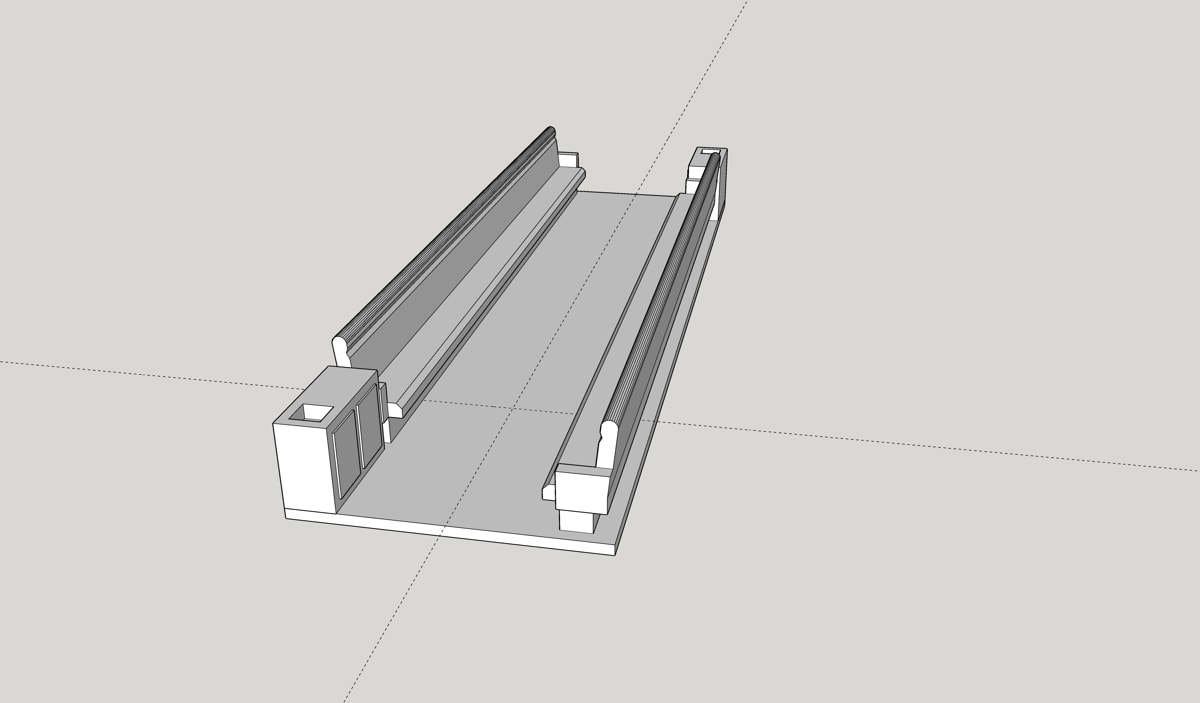
HO Excursion interior 3 (long bench seats). This will also fit inside a MDC Overton passenger car. |
 |
Excursion 3 | stl |
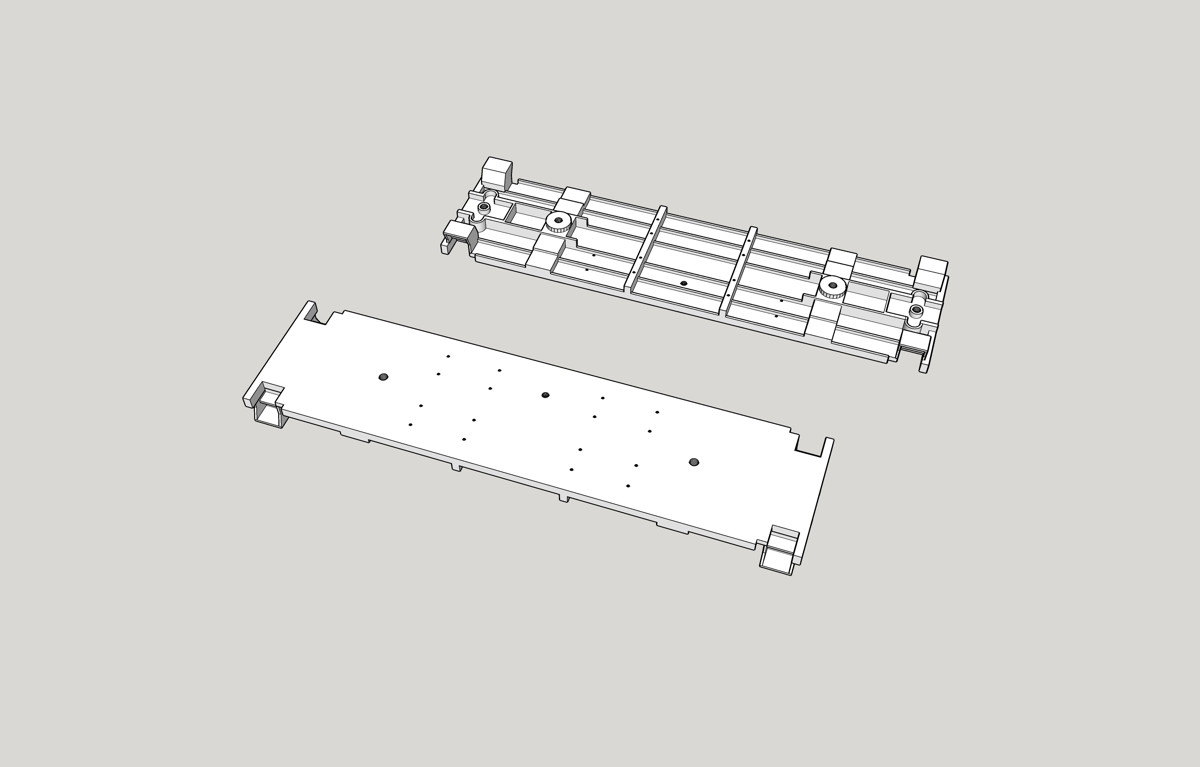
HO Overton 34' passenger car floor. This is 3D printed to match the MDC cars and will work with the excursion body above. |
|
stl | |
My plan for the excursion car bodys. The upper plan and cross section represents 34" high sides and is the one shown in the pictures. The lower plan is for one with 42" sides but when printed, it does not look as good. I have the print file for the 42" if anyone is interested. |
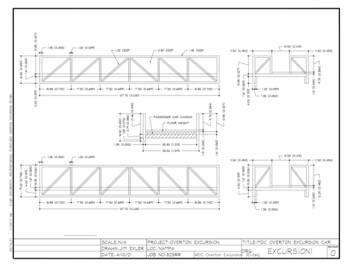 |
Excursion body plan | |
| Original MDC Overton passenger car instruction sheet | 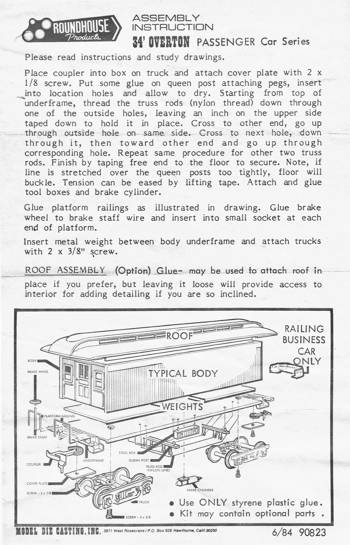 |
Instruction | jpg |
